

It was time again to think about Christmas presents and I came up with this idea of maybe making some fancy chopsticks and a wooden case to keep them in. Chopsticks are not that easy to just run off on a table saw owing to their small size, and the fact that they are tapered in 4 sides. It’s hard enough accurately cutting the square blanks before beginning the tapering.
Looking around on the Internet I found that most people make chopsticks using a hand plane and some sort of jig to set the proper taper. There are some very expensive kits available, and I guess if you want to go into this full time they are worth it, but I just wanted to run off a few gift sets. I figured (correctly) by the time I did that, what with my short attention span and all, I’d be ready to move on to something else.
Here is the jig design I came up with after borrowing heavily from some You Tube examples:

The jig is sized to fit my jack plane which slides along the grooved runners in the sides of the jig. The free floating backing board inside the jig has a U- shaped groove for holding the chopstick during the initial creation of the 4 flat tapers. Then it is flipped upside down to to expose a V grove which holds the blanks edge up for chamfering tapered edge about 3/4 of the length of the blank, resulting in a square shape at the head of the chopstick and an octagonal or rounded shape at the narrow tip.
The backing board is positioned and locked in place with wedges and a couple of screws run through the side of the jig. With some trial and error you position the backing board on a slight slope so that after planing all sides, the thickest end of the chopstick is about 7mm and the narrowest part is about 4 mm. Notice the thin pieces of plywood fastened to each end of the backing board. They act as stops to keep the blank from being dragged out of the jig by the plane blade.

Start by making a bunch of blanks about 8mm thick on each side on the table saw. Make sure they are very square on all sides because you can’t correct this with the jig. Set up the jig for flat planing first and taper all your blanks at once. Your plane blade needs to be scary sharp for this and it should be set to take off a very thin shaving with each pass. Make a few passes and then flip the blank 180 degrees and do the opposite side until nothing more is removed. You now have two sides tapered. Flip the blank onto one of the untapped sides and repeat the process. when all the blanks are tapered, flip the backing boarder to the V groove side. Set it up so that you plane the edge about 3/5 of the way up the blank, resulting in a squared end at the top of the chopstick that transitions into an octagonal shape at the tip. If this is confusing, just look at a typical chopstick some time and you’ll see what I mean.
I wanted to use some contrasting woods so I selected black walnut and arbutus (madrone). I’m lucky that arbutus grows right here, literally in my yard, and it’s quite a nice hardwood to work with, particularly for small projects like this.

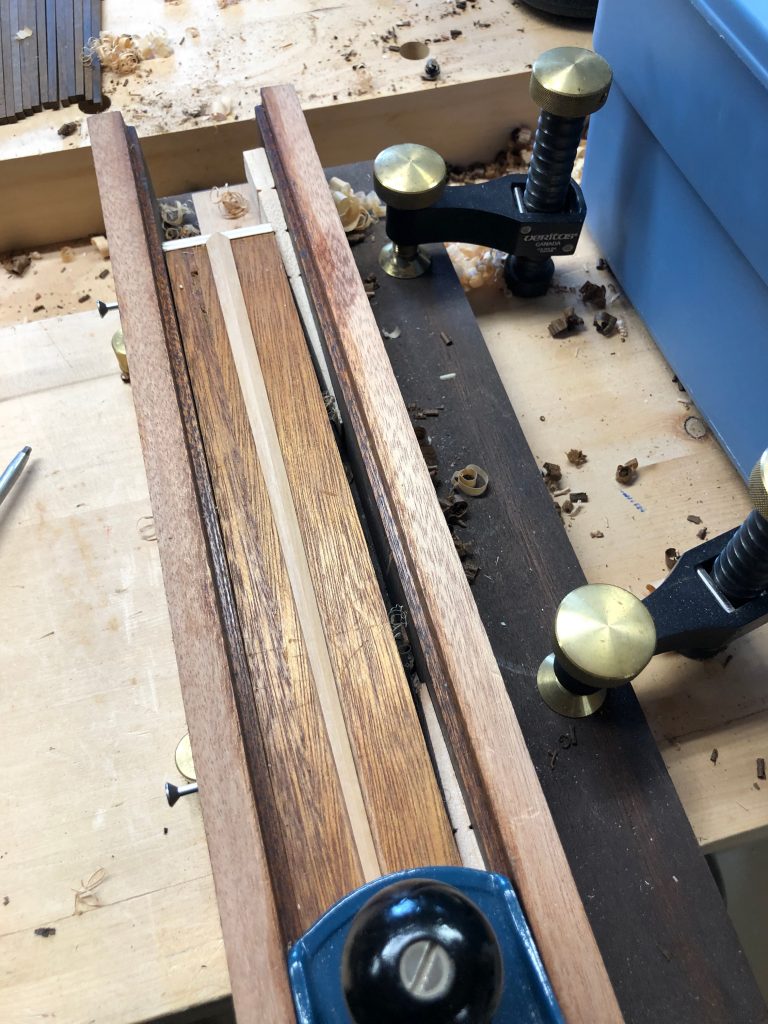
In the photo below you can see the toe of the plane in the track and the chopstick is positioned in the V groove. Note the wedges and screws holding the backing board in place and the bench clamps keeping the whole thing secure.
The next step is to bevel the edges so that the chopstick is octagonal at the skinny end but square at the top. When is is flipped over, the other side of the planing jig chopstick support has a V groove designed to hold the chopstick at the correct angle for beveling:
Now it’s time to make them fancy. On the tables, using a clamp jig to hold them upright, I cut a slot in the ends of each chopstick, then I glues in arbutus and walnut filler pieces of the opposite species of chopstick.


Then some quick planing and trimming and we’re ready for the next step.

The adjacent sides are going to have little plug inlays so we need a way of drilling very accurately centred holes in a tapered stick. For that i came up with centering jig made out of some navigation chart parallel ruler. They pivot around he centre of the aluminum braces that holding each plastic ruler apart. When you squeeze them together, anything trapped in between them is centred perfectly under the drill bit.

A nail acts as a stop for positioning the hole a uniform distance from the end, To avoid tearout, I drilled a shallow hole from both sides rather than all the way through:

So now we have all the holes drilled:

Time to head to the pencil sharpener, no shop should be without one! I take some unused blanks of both walnut and arbutus and I sharpen the ends:

Then I cut off some little tapered plugs to glue in the holes:

With the two types of chopstick blanks now prepared it was time to for a bit of light sanding down to 600 grit and they were done.
Next it was time to make a box to store them in and to shape some small wooden blocks to act as rests. The saw blades below are used to make box joints. I had some fine grained old growth cedar blocks that were perfect for the job.

This saw fence jig has a guide glued in placed for making the 1/4″ finger joints:

The box features a sliding lid and a raised platform to hold the chopsticks above the wooden rests:

I decided to hollow out under the raised ends to act as secret compartments so I had to rig up a jig for the router:

Then it was time for finishing:

The final product:

